The Audio Service is not running is almost a common error on Windows 10 and sooner or later every Windows 10 user will face this issue.
So the next time the Audio Service is not running on your Windows 10 device using these two quick and easy methods to solve the issue.
Note: If the issue still persists after implementing these methods a few times then you should contact your local computer expert to avoid any further damages.
2 quick and easy methods for solving ‘The Audio Service is not running’ issue:
Method 1: Modify the audio-related services settings
This problem is probably the improper status of the Windows audio service and any other of its dependencies. Correcting status can solve your problem.
Follow these steps to modify any audio-related services settings:
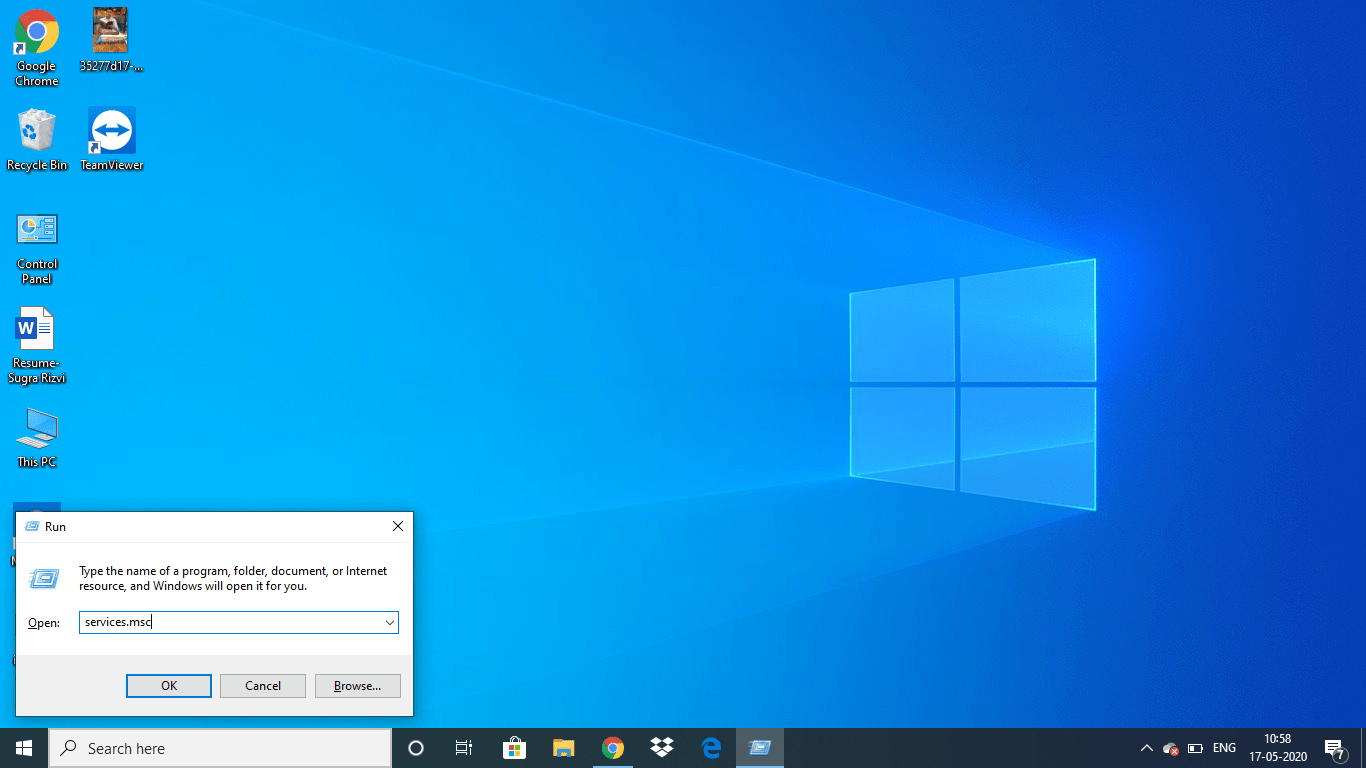
Step 1) Press and hold the Windows logo key and R simultaneously to open the Run box.
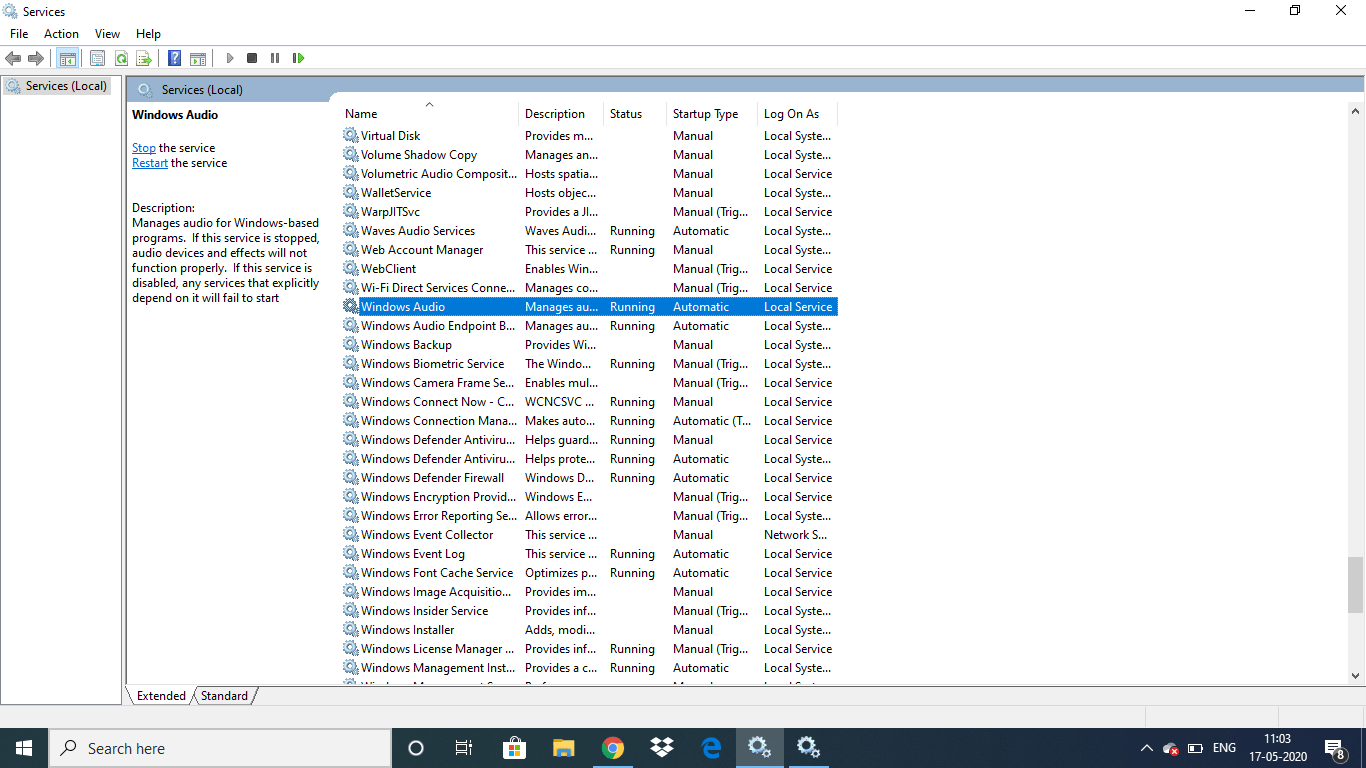
Step 2) Enter the command services.msc and press Enter. This will open the Services window:
Step 3) Then select Windows Audio, and click Restart.
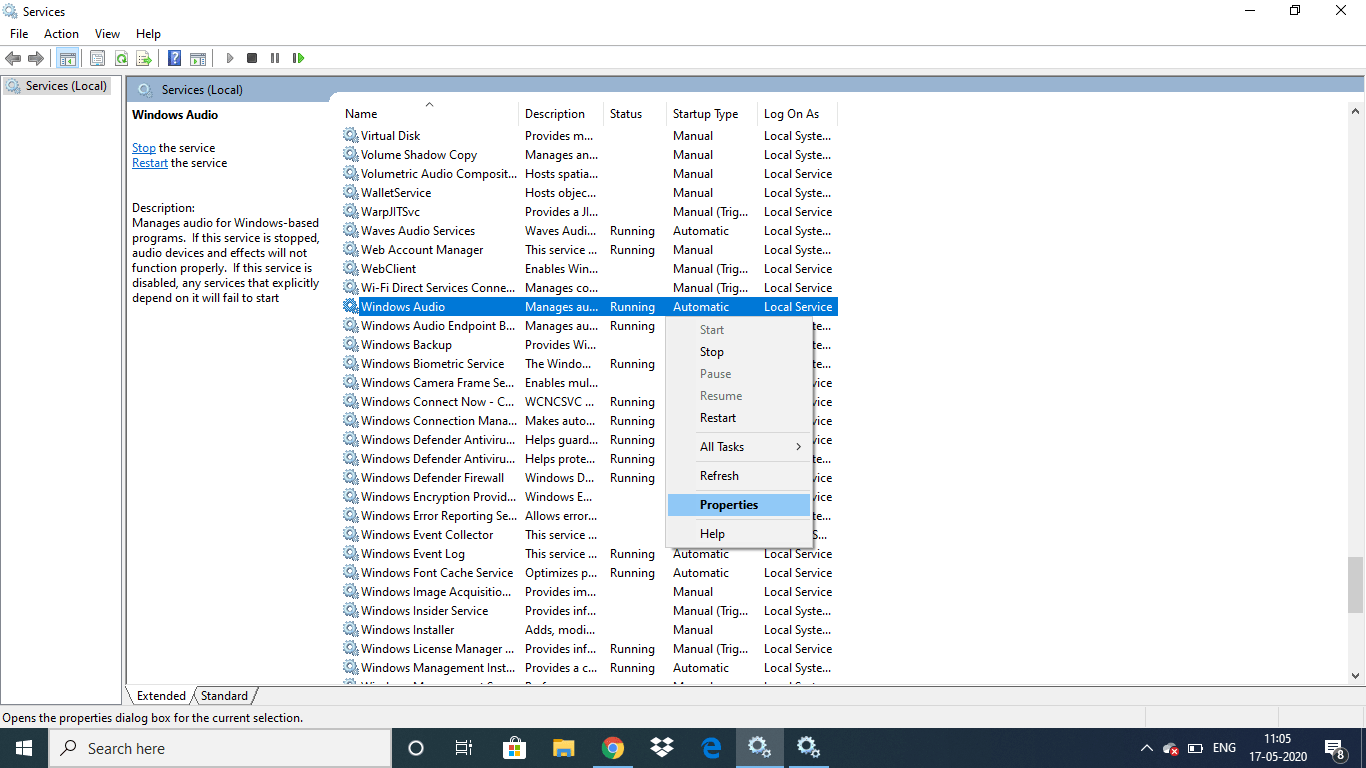
Step 4) Right-click Windows Audio, then click Properties.
Step 5) Then make the Startup to Automatic and click Apply > OK.
Step 6) Follow the same steps to set the Startup type to Automatic for:
Windows Audio Endpoint Builder, and Multimedia Class Scheduler
Step 7) See if the audio issue is fixed by trying to play a video or music or a video file.
If the Audio service in Windows 10 is still not working then try out this next method to solve the issue.
Method 2: Update your audio driver
If your Windows 10 PC is running an old or outdated audio driver then that could also cause the audio service on Windows 10 to stop running. Update your Audio Driver and restart your computer, then play a video or audio file to check if the issue is solved.


