It is almost impossible to record clean audio without having some unnecessary background sounds. So unless you are willing to invest in a recording studio you can use these 3 quick and easy methods to reduce the background audio sound in your recording without spending a single penny.
Tip to reduce audio sound from your recordings: Room Tone
The first and most important thing that most professional audio editors do is that they record a minimum 10 seconds of “room tone”, so if you are aiming to improve your audio recording I would recommend you to do the same.
What is Room tone?
Room tone basically means that you record a minimum 10 seconds of the natural noise of the environment where you are going to record your audio (while recording room tone do not talk, breathe heavily or make any sort of sound ) a microphone is very sensitive meaning it picks up sounds of the computer fan, ventilation noise, car horns from far away, etc even if we are unable to hear these sounds.
By recording “room tone” you will have a baseline which the free software can use to remove noise.
If you forget to record room tone before you start recording your Audio then don’t worry just record a break between time or takes at the beginning or end of the file where nothing much is happening, that should suffice for noise removal purposes.
Now that we have recorded room tones lets see how to reduce Audio sound using free software.
Here I will show you how to reduce background audio sound using a free software called Audacity. This software was developed by a community of audio experts and programmers as an alternative to the expensive high-end audio softwares.
Audacity is compatible with a wide range of audio file types that comes inclusive with a very useful noise removal tool. However, this tool only lets you remove background sound from audio files and not video files. Click here if you are looking to remove background noise from video files.
Here is how you can reduce audio noise in Audacity
Step 1: Select your silent section or room tone from your audio file

Step 2: Then drag your mouse cursor towards an area with no (or little) audio.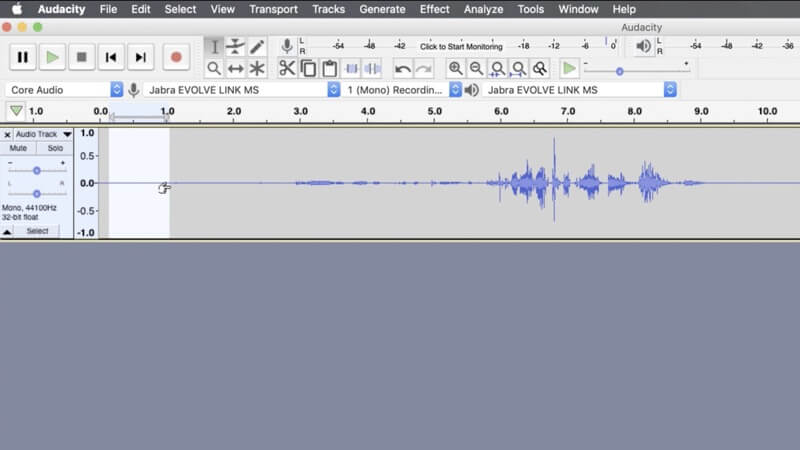
Step 3: Then go to the Effect menu and click on Noise Reduction

Step 4: Select the option “Get Noise Profile” and the pop up will disappear. 
Step 5: Then select the entire audio clip by going to the “Select” option and click “All” 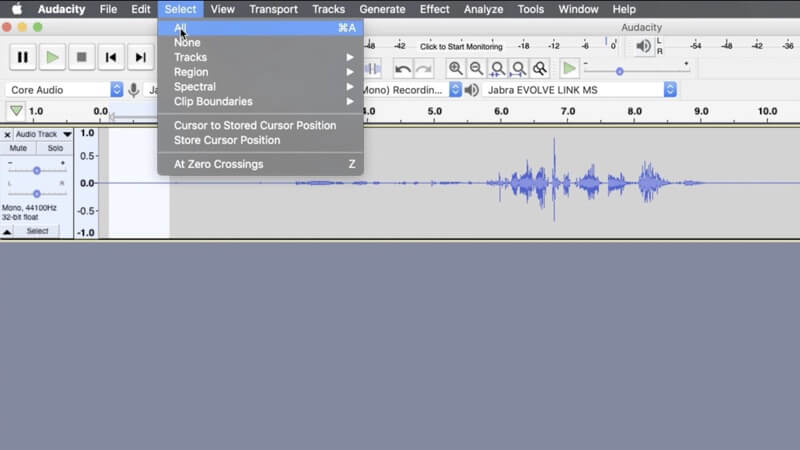
Step 6: Open the “Effect” menu and click “Repeat Noise Reduction”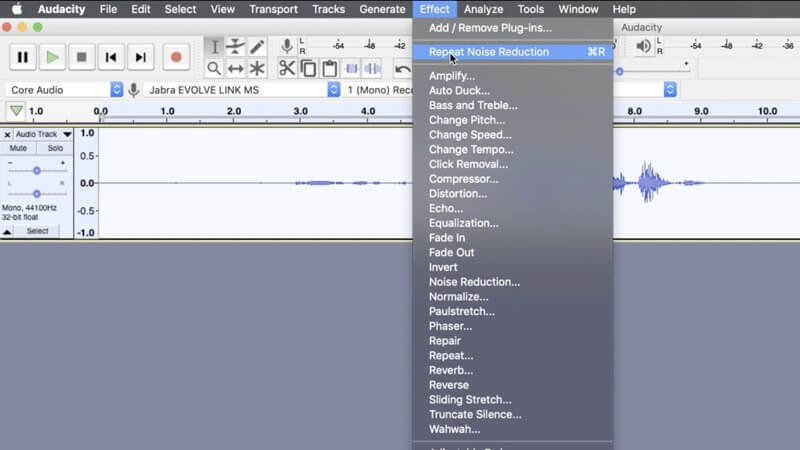
Step 7: LIsten to your edited audio to ensure that the it does not sound muffled.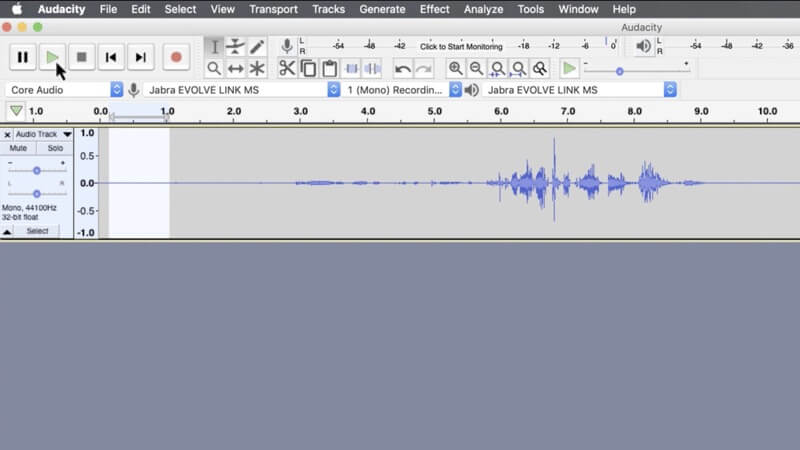
What is the function of sliders for noise reduction:
Noise Reduction: Sliders let you control the frequency of reduction of your noise volume.
Sensitivity: It also lets you customize the range of what noise removal considers as noise. The higher the noise removal frequency the more it will affect actual audio (such as voices).
Frequency smoothing: By default the setting is 3, for music files setting the frequency lower than 3 is preferable and for spoken words setting frequency above 3 is recommended.
Reduce and residue buttons: You will need a reduce option to know the quality of your preview as it lets you test what the audio will sound like after you have reduced background noise.
Final Words
For those Audio editors who are willing to spend some money for removing background noise I would recommend programs like Izotope RX5 or Adobe Audition, these softwares are highly recommended by professional audio editors.
So while there are many ways in which you can reduce background noise from your audio files the most efficient way to do so is by going old school and taking all the important steps to minimize background in your initial recording.
You may also like: The best Soundcloud alternatives with unlimited hosting