
In this guide you will learn how to solve the KERNEL_MODE_HEAP_CORRUPTION blue-screen error in six different steps. The error occurs on almost every PC from time to time, it is a minor error hence you do not need to call in an expert to fix the issue. Just follow this guide the next time your screep shows the kernel_mode_heap_corruption error.
Contents
How to solve the Kernel Mode Heap Corruption error
The Kernel Mode Heap Corruption can be solved in 6 different methods. I have tried each of the 5 methods on my Windows laptop to provide screenshots and proper steps to solve the issue. You do not have to try out all 5 methods to solve the issue, just try each method until one of it solves the issue in your Windows device.
Note: These methods can be performed by any individual with basic knowledge of a computer, you do not need a computer technician to try out these methods.
IMPORTANT: The first thing you need to do is enter safe mode and then reboot your computer. Following which you can then begin trying out these methods to solve the Kernel Mode Heap Corruption Error
Method 1: Roll back your graphics card drivers
Many Windows users have complained that they come across this ‘blue screen of death (BSOD)’ error right after they update their graphics card drivers (or a Windows Update). If you too are facing this error right after an update you will have to restore your video driver to a previous version to secure the stability of your hardware device. Follow these steps to do it safely:
1) Press the Windows logo key and R simultaneously on your keyboard to open the Run dialog box. Then enter the command devmgmt.msc into the box and click OK.

2) Now on the Device Manager window, double-click on the Display adapters node to view its entire drop-down list.

3) Then Right-click on your video card and from the context menu click Properties.

4) Then open the Driver tab and click Roll Back Driver.

If the Roll Back Driver option is not clickable it means that there is no driver to roll back to. If this is the case you move on to the next method.
5) If you are able to click the Roll Back Driver option, click on it and then select the reason based on your own situation and click Yes.

6) Now restart your computer to allow the changes to come into effect.
Wait for a few minutes to confirm if the Kernel Mode Heap Corruption is solved after you restore your video driver to a previous version, if not, try out the next method.
Method 2: Repair corrupted system files
Your computer may have some corrupt system files due to which you are seeing this blue-screen error. You can repair any corrupt files on your computer using these 2 steps:
1. Scan with System File Checker
System file checker (sfc) is a Windows utility that can detect and repair corrupted system files:
1) Press the Windows logo key and R simultaneously to open the Run dialog box. Then enter the command cmd and press Ctrl+Shift+Enter to run Command Prompt as administrator.

2) Click Yes when you are prompted by Windows to make changes .
3) In the Command Prompt, enter this particular command (note there is a space between sfc and /):
sfc /scannow
Once you enter the command then press Enter on your keyboard. Now, wait for a few seconds while the SFC tool automatically scans all system files. It will then repair all corrupted or missing files.

4) Keep your computer switched on until the verification process is completed. Following which, restart your computer for the changes to take affect.
If you still face the Kernel Mode Heap Corruption Error, opt for running the dism.exe command before switching to another method.
2. Scan with dism.exe
Deployment Image Servicing and Management (DISM) is an in-built Windows tool that detects and repairs your Windows installation if it is corrupt.
1) Press the Windows logo key and R simultaneously to open the Run dialog box. Then enter the command cmd and press Ctrl+Shift+Enter to run Command Prompt as administrator.

Click yes if it asks for permission.
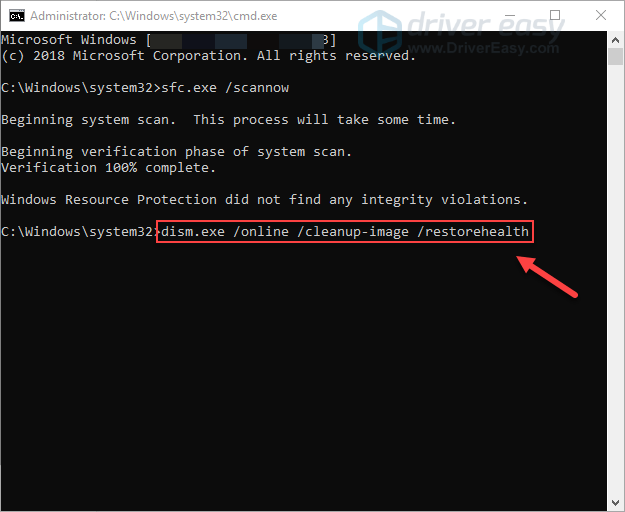
2) Type the following command in the Command Prompt (note that there’s a space to the left of each slash “/”):
dism.exe /online /cleanup-image /restorehealth
Then press Enter on your keyboard. Now the DISM tool automatically starts scanning for any problems and will fix them if found.
Wait for a few seconds while the scanning is complete. Now reboot your computer and check if the Kernel Mode Heap Corruption error persists. If it still does try out the next method.
Method 3: Resolve any software conflicts
Software conflict is a very common thing that can be a cause for the Kernel Mode Heap Corruption error on your computer. This is a highly likely possibility if you face the error when you try to launch a particular program after installing a new app or a video game.
There is no way to conclude which specific applications are conflicting with the kernel mode. Hence, you will have to shut down all unnecessary programs (associated background processes included). Then refresh your computer a few times to see if the error still persists.
1. Check to see if you have any software conflicts
1) First you need to close all programs. For this, manually switch to each program, and close it as you usually do (e.g. by clicking the × at the top right of the program).
2) Then use the following steps to end all unnecessary background processes:
I. Press the Windows logo key and X simultaneously, then click Task Manager.

II. Then open the Processes tab and open the program that you want to shut down from the list in Task Manager and force a close by clicking End task. Note: Make sure you save any unsaved work if you are using a program like Microsoft Excel.
Make sure you do not close any unfamiliar programs. You may end up causing more damage to your system if you unknowingly shut down any important system programs.
III) Wait to see whether the error reoccurs:
- If the error DOES reoccur – The issue is not being caused by a software conflict, you need to try out a different method to solve it.
- If the error does NOT reoccur – The issue is being caused by either one or more programs. You will now have to identify which program(s) have caused the error, as described in Option 2 below.
2. Find out which programs are causing your conflicts
If Kernel Mode Heap Corruption is solved by closing all unnecessary programs, you know that the error was being caused by one of those programs. Now all you need to do is identify which program is the culprit.
To identify the corrupt program, restart all the programs one by one, and find out after loading which program does the error come back. You will find out exactly which program is causing the error to occur.
However, this may not be the only problem. The issue can also be caused as it is conflicting with another program( One that you restarted before) and that conflict can be the cause of the error.
If the program causing the error is not needed you can simply disable or uninstall it. However, if the offending program is required, check if it conflicts with something else (if there is a possibility to disable/uninstall the other program instead). Here is how you do it: Keep the offending program running>shut down all other programs again.
If the error still persists you can conclude that the program is the sole cause. But if the error goes away you can know for sure that the program is conflicting with another program. Now to know exactly which program is causing the error you will have to restart them one by one until the error message is seen on your screen.
Once you establish which programs are conflicting with each other, uninstall or disable the one that is not needed.
3. De-prioritize, disable or uninstall conflicting programs
Now that you know which programs are causing the conflict, you can do three things:
To set the program’s priority to low
If you feel the program is important, rather than uninstalling it you can opt to de-prioritize it. Here is how you can de-prioritize the program:
1) Press the Windows logo key and R simultaneously to invoke the Run dialog box. Enter the command taskmgr and hit Enter.

2) Then click on the Details tab. Scroll through the list and search the option that says change the priority. Then Right-click on that item and click Set priority > Low.
Note: If you are not familiar with any programs then do not change their priorities. By setting the priority of a crucial system process to low, it can result in freezing, system crashes, or other critical problems.
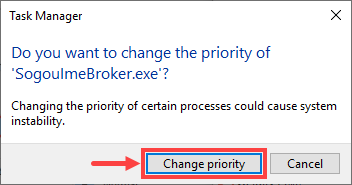
3) Select Change priority if permission is needed
To permanently disable the program:
1) Press the Windows logo key and X simultaneously, then click Task Manager.
2) Then in the Processes tab, click on the program that you want to shut down from the list in Task Manager and click End task to force a close.
3) If the selected program is in the startup items, you will have to shut it at startup. Here is how you can do it:
Press the Windows logo key and R simultaneously to open the Run dialog box. Then enter the command msconfig and hit Enter.

4) Open the Startup tab, and select Open Task Manager.

5) Now choose the programs that you want to shut when Windows starts and click Disable.

To uninstall the program:
- Press the Windows logo key and R simultaneously. Then enter the command appwiz.cpl and press Enter.

2) From the Programs and Features, right-click the program that you want to uninstall and select Uninstall.

If the error still reoccurs after de-prioritizing, disabling or uninstalling try out the next method.
Method 4: Resolve any hardware issues
The Kernel Mode Heap Corruption error is also caused if your computer has hardware problems. Follow these steps to check if your computer has any hardware problem:
1. Run Windows Memory Diagnostic Tool
By running the Windows Memory Diagnostic tool you can find out if there is any problem with your Random Access Memory (RAM):
1) Press the Windows logo key and R simultaneously on your keyboard to open the Run dialog box. Then enter the command mdsched.exe and hit Enter.

2) If you want to check your memory right away click on Restart now and check for problems (recommended), or you can click on Check for problems the next time I start my computer if you wish to continue your work and perform the memory check later.
Note: Always save your work before clicking Restart now and check for problems (recommended). This will enable your computer to reboot instantly.

3) While the Windows Memory Diagnostic Tool is running, you can view the screen that indicates the number of passes it’s doing, along with the progress that it has made.
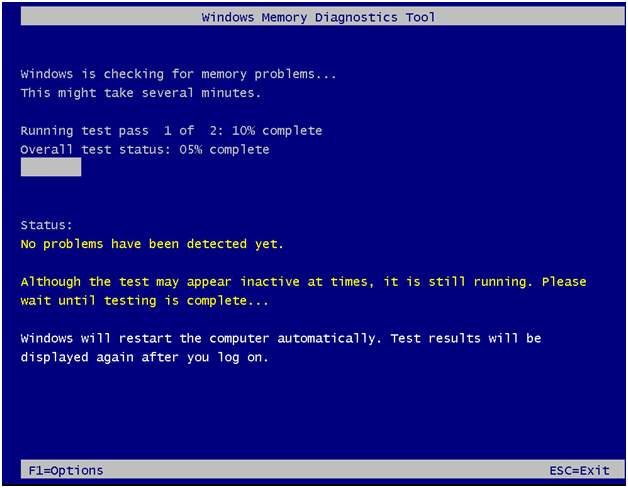
The memory of your computer is completely fine if you do not see any errors here, however you will have to replace your RAM or contact the hardware manufacture if you see a message that says “issues detected”.
2. Check for other issues such as overheating
I would not recommend this step if you are not a computer expert. However, if you know how to disassemble a computer you can solve the heating issue by opening the computer chassis, then look for any issue in each separate component, and find solutions to fix them. Performing all these steps is a major task and if not done right can lead to further damage to your computer. The efficient solution is to contact a local computer technician and seek expert assistance.
If Kernel Mode Heap Corruption error still persists move on to the other method that is to reinstall the Windows system.
Method 5: Reinstall your Windows system
If you have exhausted all of the above methods yet you are facing the Kernel Mode Heap Corruption issue then you will have to reinstall or reset your Windows operating system.
By Resetting Windows your system will revert to its initial state just like it was when you turned your computer for the first time. All apps that did not come with your PC will be removed and you will also get the choice if you want to retain your data or not.Windows will perform the resetting process by itself as it does not require any external storage devices to perform the task.
When you perform a clean install of Windows it erases all your data from the drive where your system is installed(that includes your personal data and all the apps that you have installed). Before you proceed with the clean install make sure you have an external storage device, e.g. a USB drive. A clean install is a much more complex process than the above methods however it is also the most impactful one.
Follow these steps to reinstall or reset Windows 10 on your computer:
To view more details about how to reset/clean install Windows 10, You can also visit this post by Microsoft Support to find out more details on how to reset or perform a clean Windows 10 install.
I hope you were able to solve the Kernel Mode Heap Corruption error on your computer using any of the above methods. Feel free to write to us in the comment section below if you have any questions or wish to add some information about the error.
Extra info: What is Kernel Mode Heap Corruption?
Windows prompts the code Kernel Mode Heap Corruption when you face the ‘blue screen error of death’ BSOD error. Similar to other codes, ‘Kernel Mode Heap Corruption’ has its own unique purpose to help users identify the problems triggering system crashes. Generally, the error is caused due to software conflicts or driver issues (specifically graphics card drivers), occasionally hardware malfunction also causes the error.
Why does the Kernel Mode Heap Corruption Error come on my computer?
The Kernel Mode Heap Corruption error is caused due to many reasons with the most common reason being the error happened during the launch of a particular program or a video game or on startup of Windows 10.