When it comes to Minecraft mods they can come in all kinds of shapes and forms that elevate your overall Minecraft experience while also offering a lot more. That’s why most gamers are constantly installing Minecraft mods. So i came up with this guide to show you how to download and install mods on Minecraft Java for free that will help you download all kinds of mods for your Minecraft account. So without further adieu, let’s get into it
Pro Tip: You do not necessarily need to follow all steps, just the one which you find most convenient on your device.
Contents
Step 1: First Install Java
To add mods on Minecraft you first need to install Java on your device, here is how you can do so
1) Visit the official Java website. (https://www.java.com/en/)
2) The homepage will feature a Java Download button, click on it

3) Another option of Agree and Start Free Download will pop up that you need to click. (Java will automatically download the version that is compatible with your device operating system, in case it doesn’t, simply click on See all Java downloads and download the Java version that is compatible with your OS.)

4) After a few minutes the Save As window will pop up for which you need to click Save.
While Java is downloading in the background you can simultaneously complete the installation process by following the above pointers.
Step 2: Download & Install Minecraft Forge
The most efficient way to create and verify mods for Minecraft is by downloading the best modding API, I would strongly recommend Forge in this case. Here is how you can download and install it:
Download
1) Open this URL: http://files.minecraftforge.net/, then press and hold Ctrl+F.
2) Now download the recommended version of Forge not necessarily the latest.
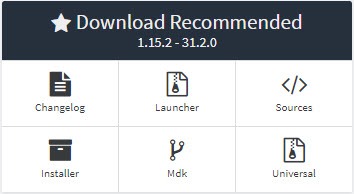
Pro Tip: The reason why I do not recommend downloading the latest version of Forge is because it may potentially have some unresolved bugs. Additionally, not all versions of Minecraft Forge are compatible with the version of Minecraft you are used to playing with.
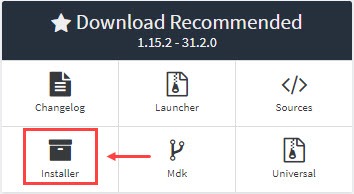
3) Click on Installer from the Download Recommended section.
4) If you see this message “Please wait … seconds…”. Don’t hesitate and wait for a couple of seconds.

5) Once you see the Skip option on the upper right corner of the page click it.

6) After that when the Save As window pops up, click Save this will start the downloading process.

Install
1) Open the program by double-clicking the Forge file
(You can open it from your downloads folder or on the web browser.)
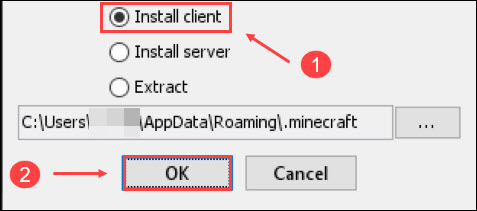
2) Click on Install client and then click OK.
3) Wait for the Complete window to pop up then click on OK to complete the installation process.
Step 3: Backup Minecraft files
While this step is not mandatory, I would strongly recommend it as adding mods can be a bit tricky. To ensure that your Minecraft progress stays intact make sure you take a backup of your Minecraft .jar file before installing any mods. Here is how to do so
1) Right-click minecraft.jar and click Copy.
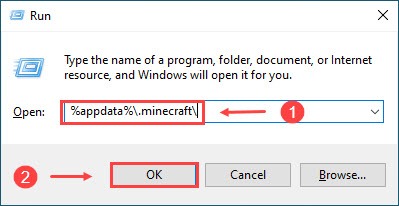
2) Press and hold the Windows logo key and R simultaneously to open the Run Box then enter the command %appdata%.minecraft\ to open the file.
3) Create a new folder, you can do this on One drive or another storage cloud like Google Drive.
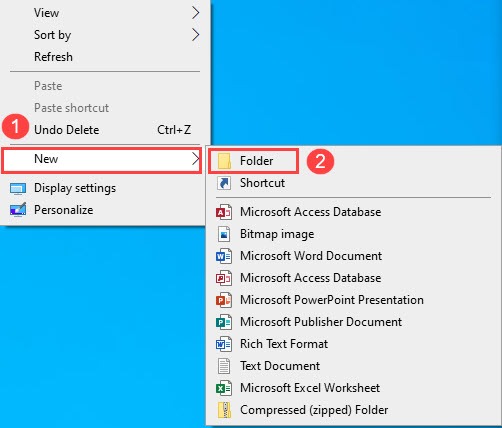
To create a new folder all you need to do is right-click on the empty space of your desktop then click New > Folder. Make sure you name the folder something that tells you it is for your Minecraft backup
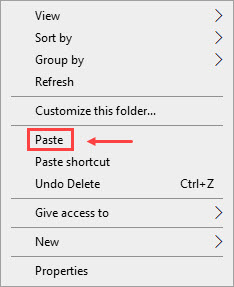
4) Now transfer the backup copy onto the new folder by Right-clicking it, and select Paste.
Step 4: Download mods only from trusted sources
There are tons of Minecraft mods available on the internet for you to choose from and gamers are known for having personal preferences so download the one that suits your Minecraft strategy. But while selecting any mod ensure that two things are clear: 1. That the mods are compatible with your Forge and Minecraft. 2. Download only from reliable sources.
Step 5: Add mods to Minecraft
Now that you have downloaded the mods, you need to transfer them into your Minecraft folder after which you need to launch Minecraft.
To do so follow these pointers:
1) Open the Run box by simultaneously pressing the Windows logo key and R on your keyboard.
2) Copy and paste %appdata%.minecraft\ command then click OK.
3) Now the downloaded .jar or .zip file needs to be added to the Minecraft subfolder.
4) Ensure that Forge is activated and proceed to launch Minecraft.
5) Minecraft mod is now installed so it will directly be applied when you click Play and start a game.
6) Play the game with the same advantages as pro gamers now that mods are added to your Minecraft.
Step 6: Update your graphic and Audio drivers to enhance your gaming experience
Many times your gaming experience can be hindered by minor issues like black screen crashes with sound looping or other in-game glitches. To avoid these kinds of issues you simply need to ensure that your graphics drivers and audio drivers are up to date.
To update the drivers all you need to do is visit the official Drivers page of the ones you are using and follow the steps mentioned there. Usually, there is a ‘Check for Updates’ button that shows you if any update is available.