There have been several complaints by PS4 gamers regarding problems faced while chatting online with other players in the party chat. According to PS4 gamers when you are testing Internet connection it shows PS4 NAT Type Failed. In this article, I will show you how to fix the PS4 NAT Type failed error.
Note: Below are 4 methods to solve the PS4 NAT type failed error, every method will solve the issue so follow whichever method you find to be the easiest and enjoy chatting online with fellow PS4 players.
Contents
What is the PS4 NAT type?
NAT is an acronym for ‘Network Address Translation’, which refers to the ability to translate a private IP address to a public IP address or the other way around. In PS4 games, it refers to the ease or difficulty of connecting to other PS4 systems, particularly if a user is using communication features like it’s party chat.
A PS4 has 3 types of NAT:
Type 1 (Open): Systems that are directly connected to the Internet (no router or firewall) fall under type 1.
Type 1 NAT systems do not face any difficulties while connecting to other PS4 systems.
Type 2 (Moderate): Systems that are connected through a router fall under type 2. If you are a type 2 NAT user you will rarely face any issue while connecting to the party chat.
Type 3 (Strict): Systems that are connected via a router without DMZ setup or open ports fall under type 3.
Generally, PS4 NAT failed to load issue is faced in type 3 as you might face problems related to voice chat or connectivity.
The most efficient way to improve your PS4 network status is to change your NAT Type. Network issues like network firewall problems or incorrect network settings are the main causes of PS4 NAT type fail error.
In order to change the NAT type status and fix your ps4 nat error, you will have to do it through the router settings.
Fix 1: Manually configure the PS4 network settings
Incorrect network settings in your PS4 can cause the NAT type to fail. So the first thing you should do is check if your PS4 IP address changed or not. If the network settings in your PS4 is incorrect you will have to manually update it
How to check my PS4 IP address?
Follow these simple steps to check the IP address of your PS4:
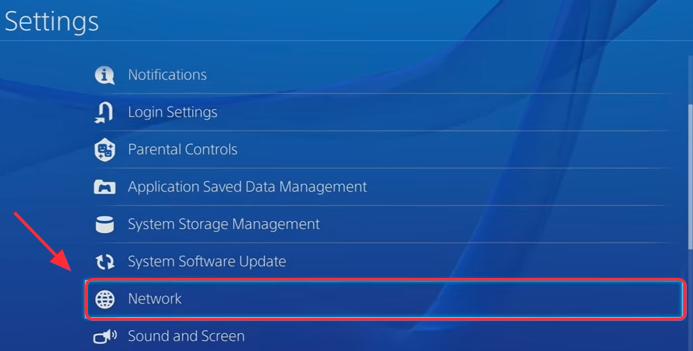
Step 1) Go to PS4 Settings > Network
Step 2) Click on View Connection Status.
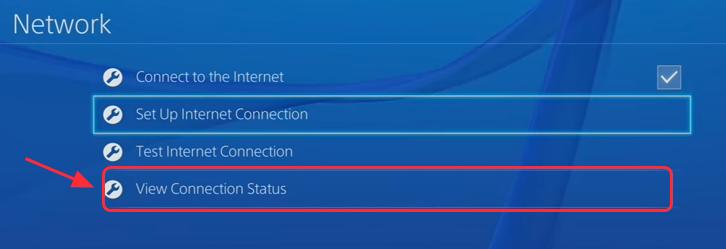
Step 3) You will see the information about the network and view connection status on your PS4 that includes the IP address of your PS4.

How can I manually configure PS4 network settings?
Step 1) Connect your Windows PC/laptop to the same network as your PS4, then hold the Windows logo key and R simultaneously on your PC/laptop.
Step 2) Type the command ‘cmd’ in the Run box and press Enter.
Step 3) Copy and paste the next command which will be prompted on your screen, and press Enter.
Step 4) Note down the default gateway, the sub-net mask, the IP address, router information and the DNS server.
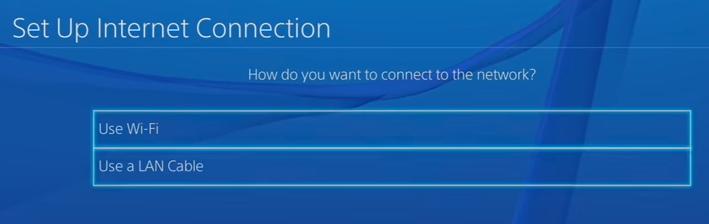
Step 5) Select PS4 Settings > Network > Set Up Internet Connection.

Step 6) If you are connecting to the Ethernet click on Use a LAN Cable or Click Use WiFi if you are connecting to WiFi.
Step 7) Click Custom, and enter the noted down network information.

Step 8) Click Do Not Use as for Proxy Server.

Step 9) Be patient as it will take a while to update. Once you have successfully set up internet connection, click on Test Internet Connection.
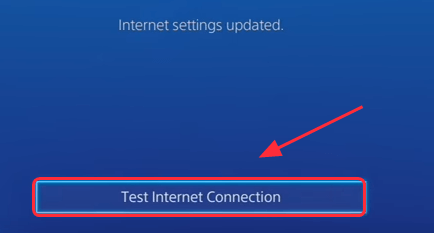
Step 10) You will know the NAT of your PS4 from the internet connection of your gaming router.
If this method does not fix ps4 nat error, move on to the next fix.
Fix 2: Enable UPnP for your router
The next fix ps4 you can try If manually configuring the network settings doesn’t do the trick is to enable UPnP (Universal Plug) for your router. UPnP refers to Universal Plug and Play, through which devices on a network are discoverable with each other.
Enabling UPnP in your router it can enhance the connection when you chatting with other people while playing PS4 games.
Enable UPnP on your router by following these simple steps:
Step 1) Check the IP address, Password, and Username which is given on the back of your wireless router or find it in the information manual given in the router box.
Step 2) Open any internet browser on your PC or Laptop, then enter and load the IP address on the browser.
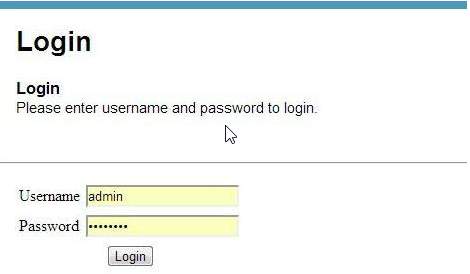
Step 3) Enter the Username and Password provider by the router where prompted.
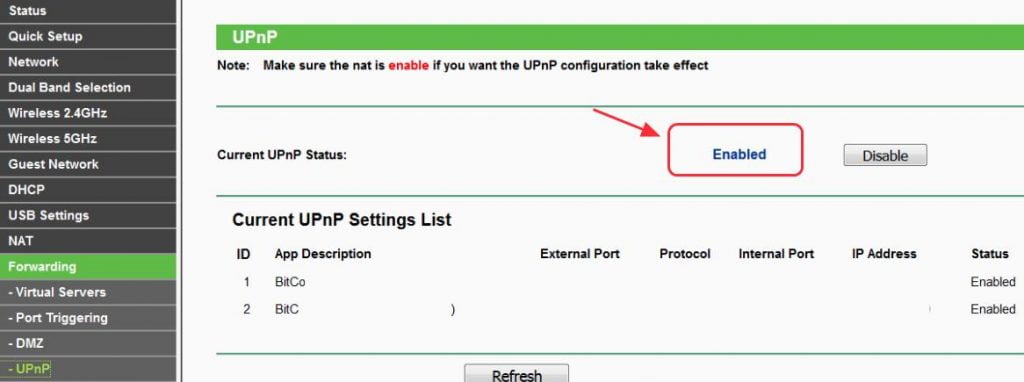
Step 4) Go to Advanced > Forwarding, and you will find UPnP. (Or hold ctrl+F and type ‘UPnP’ to find it on your screen.)
Step 5) Switch on UPnP. and select Save to save the settings.
Step 6) After saving the settings Reboot your router.
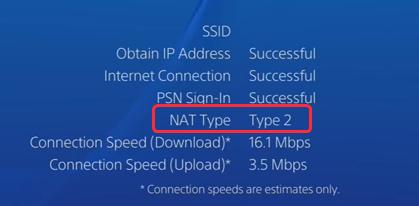
Step 7) Check if your NAT Type is on by clicking PS4 Settings > Network > Test Internet Connection (You should see type 1 or type 2 meaning it is on).

Fix 3: Make your PS4 the DMZ server
DMZ refers to Demilitarized Zone.
The demilitarized zone is the logical or physical or sub-network that consists of an organization’s external-facing services to a network that is not trusted.
Provided that the settings are properly checked, this method to fix the error can help you correct the network configurations on your router, and also boost your network performance (You might have some security concerns regarding this method, but it is safe as you are using it for your home IP address and not for a public IP address). In case you are accessing the internet on a public network then switch to another method from this list or use your home IP address to fix ps4 nat error.
Follow these steps to make your PS4 your DMZ server
Step 1) Note down the IP address, Password, and Username given on your wireless router.
Step 2) Load a browser on your PC/Laptop then enter the IP address and load it.
Step 3) Enter the Username and Password where prompted and log in.
Step 4) Hover on to Advanced > Forwarding, you will find DMZ towards the left side of your screen. (Or use shortcut ctrl+f and type DMZ to find it on your screen.)
Step 5) Select Enable to enable DMZ.

Step 6) Make the required changes to match the IP address with the IP address in your PS4. (See Fix 1 to know how to find your PS4 IP address.)

Step 7) Select Save to save your settings.
Step 8) Once your settings are saved Reboot your routers and wait for it to connect.
Step 9) Check if your NAT type is on by selecting PS4 Settings > Network > Test Internet Connection (you should see the Type 1 or Type 2 NAT for your PS4).

By following this method it will drive all the network traffic to your PS4 thus reducing the network restrictions while using PS4.
Having problems with your Playstation 4? here’s what you can do if your PS4 won’t turn on.
Fix 4: Forward Port for your PS4 network
Port forwarding, or port mapping, means you are redirecting a communication request from one address and port number to another while packets are traversing a network gateway. Forwarding the posts can help boost the connectivity of your router network.
Note: You can do port forwarding only if your Internet Service Provider (ISP) does not have Carrier-Grade-NAT.
Follow these steps for successfully forwarding your port
Step 1) Note down the IP address, Password, and Username on your wireless router.
Step 2) Load a browser on your PC/Laptop then enter the IP address and load it.
Step 3) Enter the Username and Password where prompted and log in.
Step 4) Find the forward ports section (or Virtual Server, ports forwarding, or, Applications as per different routers).
Step 5) Add the custom forwarding ports. You can also check these steps to change the following ports that are recommended by Sony:
80(TCP), 443(TCP), 3478(TCP and UDP), 3479(TCP and UDP), 3480(TCP)
Note: Assign and give a name to your PS4 IP address to each of these ports. (See Fix 1 to know the IP address of your Ps4)
Step 6) Click save to save your changes.
Step 7) Check your NAT type by clicking PS4 Settings > Network > Test Internet Connection.
Conclusion
These are the 4 easy methods to solve the PS4 NAT type failed error. Feel free to comment below to share your ideas. If you have any further questions, please let us know and we’ll see what more we can do to help.